Procedure
How to adjust the DCR-2
- All DCR-2 information is kept on the State Database Sharepoint site: DCR-2 then categorized by fiscal year and quarter. The DCR-2 spreadsheet that is the “master” version gets pinned to the top name “MASTER....updated mm.dd”
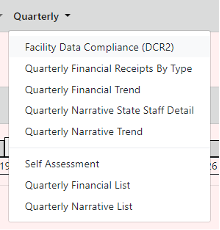
- The DCR-2 is pulled weekly from the database called “Facility Data Compliance (DCR2) from the top bar under “Quarterly”

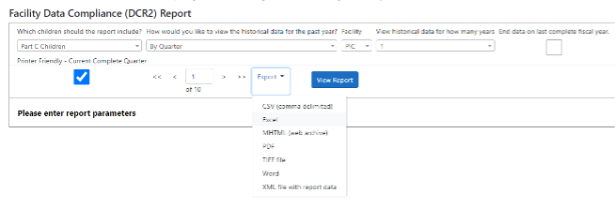
- The default is for Part C children, then I change the view historical data for how many years to 1 (default is 2) and Export to Excel to get the spreadsheet named, “Facility Data Compliance (DCR2)” there will sometimes be a number at the end if you haven’t renamed a previously downloaded version.
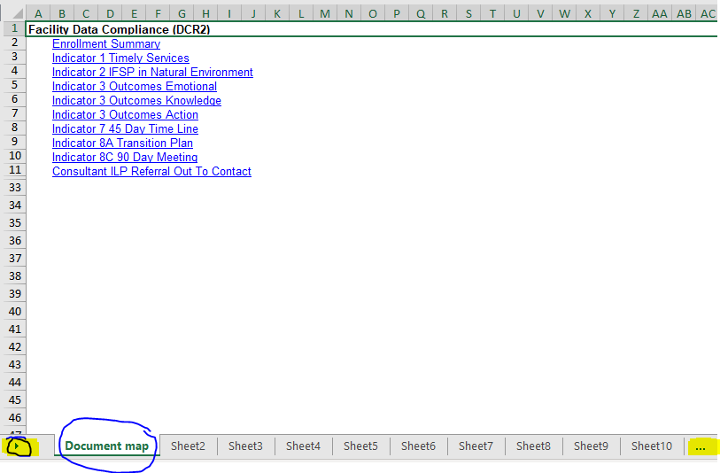
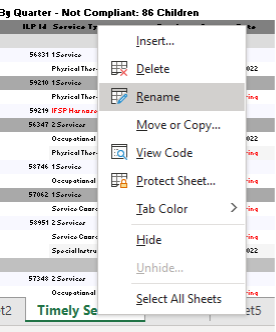
- The spreadsheet is set up in tabs by indicators. I always have to scroll through to get to them all, using the arrow on the far left of all the tabs or the three dots on the far right (highlighted below)
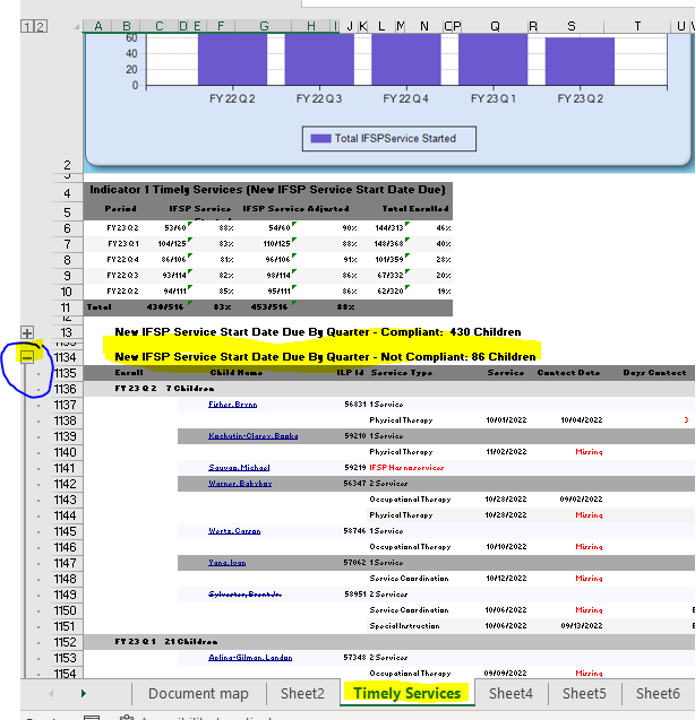
FOR CREATING THE MASTER VERSION- Starting with Sheet3, I rename the tabs by what the Indicator is AND expand the + for the Not Compliant Children
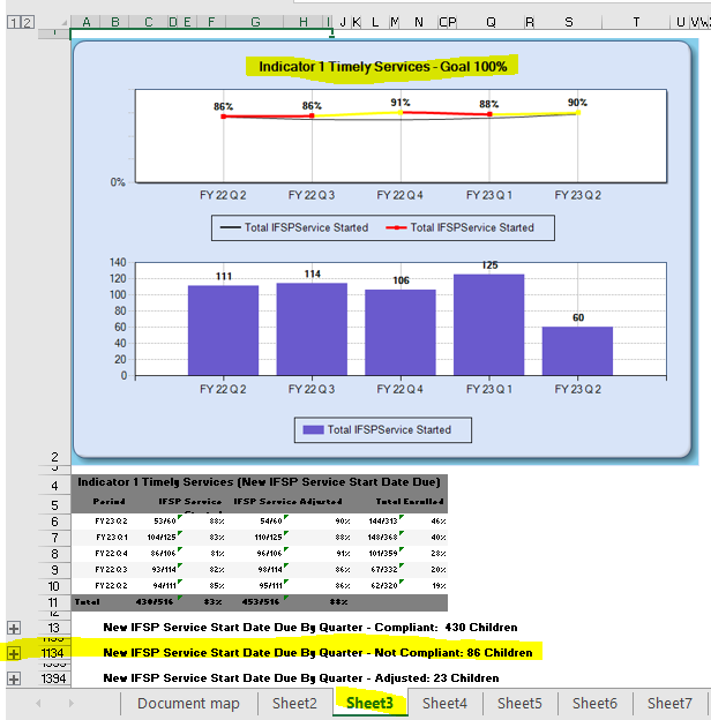
- To rename the tab simply right click and choose “Rename” and start typing the Indicator. To expand the Not Compliant Children, you simply click on the + sign (highlighted).
- PRO TIP: Use the Desktop version of Excel, since the web version, which doesn’t always show the + easily.
- PRO TIP: Use the Desktop version of Excel, since the web version, which doesn’t always show the + easily.
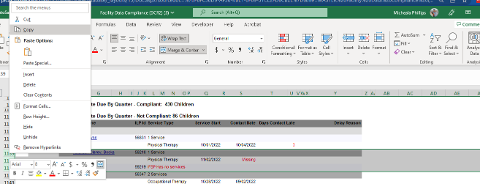
- PRO TIP: Ctrl + A highlights everything in a sheet and you can adjust the formatting in the following ways for usability:
- Right click and “Remove Hyperlinks” to allow for copying and pasting of names and SDB#
- Confirm the font and size in Home tab
- Update the fill color to be appropriate (see key)
- In the document map tab, I usually give a color key of what each highlight means. Here’s an example:
- Yellow highlight: needs to be addressed
- Green highlight: should fall off/strike through
name = has fallen off - Orange highlight: needs provider feedback
- Pink highlight: needs to be adjusted by the state
- Red highlight: will be non-compliant explanation given on Quarterly Narrative
- Repeat this process for tabs 3-10
- Save as “MASTER Facility Data Compliance (DCR2)updated mm.dd” with the current month and date in the correct fiscal year and quarter, then pin to the top of the folder in SharePoint

For updating the Master DCR-2 weekly - Pull the DCR2 as usual and save it to the same SP site as “Facility Data Compliance (DCR2) as of mm.dd”
- Then for each tab I compare the Master spreadsheet to the most recent version and copy/paste any new kids onto the master, inserting them in alphabetical order.
- PRO TIP: the easiest way to keep the formatting from causing issues (due to merged cells) is to insert the number of rows you’ll be copying in the Master version, then copying by the row number (the right click option) and pasting by Ctrl + V. While it’s still highlighted, right click to “Remove Hyperlinks” and adjust formatting as preferred
- PRO TIP: the easiest way to keep the formatting from causing issues (due to merged cells) is to insert the number of rows you’ll be copying in the Master version, then copying by the row number (the right click option) and pasting by Ctrl + V. While it’s still highlighted, right click to “Remove Hyperlinks” and adjust formatting as preferred
- Starting with Sheet3, I rename the tabs by what the Indicator is AND expand the + for the Not Compliant Children
Adjusting Indicators
- Timely Services
- This is looking at the start date listed for each service type on the child’s IFSP.
- Look the child up in RT to confirm the summary of services and start dates are correct in the Database (ruling out data entry error).
- Assuming the start dates and services are correct, go to Visit History to look for any cancellations or unposted charges.
- We’re looking for Cancellation by Family or comm log notes detailing why services were lat
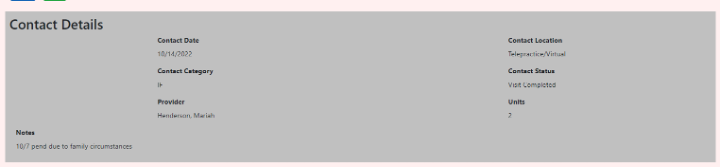
- Once the service has been delivered/started, then go to the Contact tab and re-enter the contact for that service
- This is looking at the start date listed for each service type on the child’s IFSP.
- 45-day timeline
- This is looking at if the initial IFSP, or enrollment, happened with 45 days of referral.
- Copy the old contact with the <late IF>

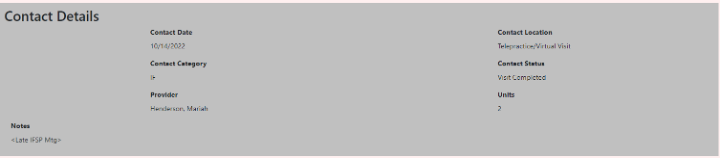
- Delete the old one (red X)
- Remake the new one and you should get a pop up like this:
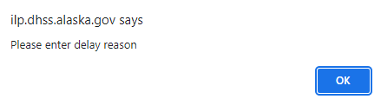
- Validate
- In the reason box fill out the reason plus include a timeline (found easily in the Documentation Follow up (Data entry)- SDB task in RT
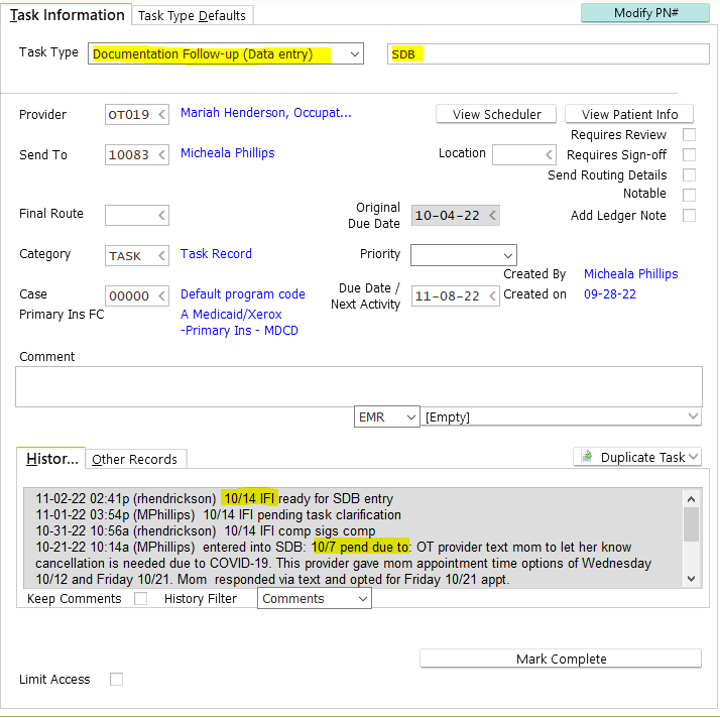
- Copy the timeline before hitting okay
- Hit validate and then okay
- Paste this into the notes and into the DCR-2 adding “contact updated as of mm/dd- Initials”
- Mark it green
- Copy the old contact with the <late IF>
- This is looking at if the initial IFSP, or enrollment, happened with 45 days of referral.